Prepare to be DAZZLED!!!!
ohhh im so excited
this is my first EVER online Tutorial on my blog.
I really hope you enjoy this, as I'm hoping to do more!
Be sure to comment - Let me know what you liked about the Tutorial and If you have any suggestions on improvements or Ideas for future Tutorials.
This is the WOW demonstration I did at the recent Melbourne Stampin' Up! Regionals
Step 1: COLLECT your Materials
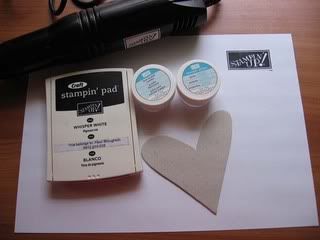
For this project I'm using:
Onboard Accents - Heart shape chipboard, Whisper White pigment ink pad, Heat and Stick Powder, Dazzling Diamonds Glitter, Heat gun tool.
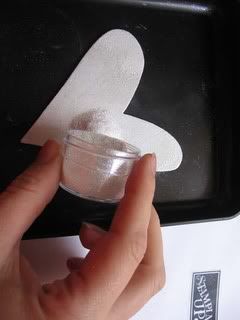
Step 2: INK up your chipboard

Using the Whisper White Pigment ink pad, ink up the entire chipboard shape.
Step 3: Sprinkle HEAT and STICK powder ALL over your 'inked' chipboard shape
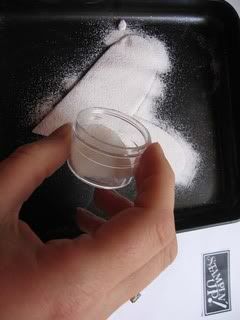
Using one of our Powder Pal trays, makes using embossing powders and glitters a breeze to clean up. Once you have covered your chipboard shape with the Heat and Stick Powder, tap off excess into the tray and then pour back into its container.
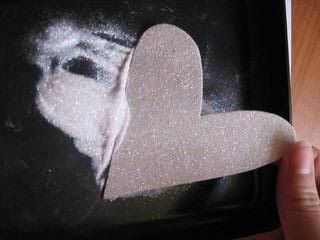
Step 4: HEAT set the Heat and Stick Powder

With your heat gun, heat the Heat and stick powder until it goes 'glossy' - take care as you CAN OVER HEAT and burn. I like to use a rotating motion. You will see the powder go from Matte to Glossy fairly quickly.
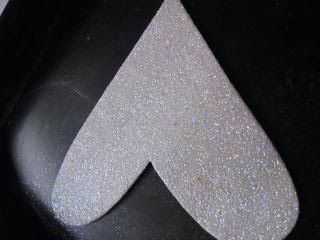
Step 5: Adding the DAZZLING DIAMONDS
Sprinkle the Dazzling Diamonds over your Chipboard piece - that is NOW 'sticky' with the heated Heat and Stick Powder - Tap off excess into your Powder Pal Tray.
Step 6: Heat Set your Dazzling Diamonds
Once again use your Heat Gun Tool to 'quickly' re-heat and to Set the Glitter. This only takes a moment - be very careful not to OVER HEAT.

Step 7: Add to a Decorative box
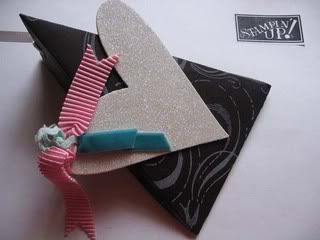
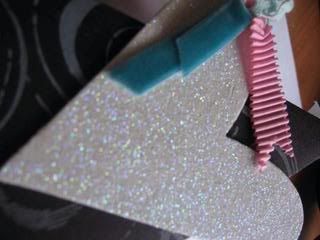
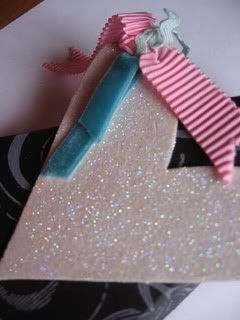
For my triangle shaped box, I have used:
Basic Black cardstock, stamped with the NEW French Flaire background stamp (available from the 1st of December) in Whisper White Ink, I have decorated my Accents Chipboard shape with some of the NEW ribbons from the FLIRTY ribbon pack (also available from the 1st of December)
I have recently posted the new SUMMER MINI - 1st Dec to 31st of March catalogue to all my customers and to those who have requested one. If you have not received your copy, or if you would like to receive one - please email me with your mailing address and I will send one out to you asap.
fleurie78@optusnet.com.au
DON'T FORGET
Our SPRING MINI Catalogue will be ENDING on the 30th of November
If there is anything in the catalogue that you would like - please email me with your order before the end of the month....as it may not make next years Idea Book & Catalogue.
this is my first EVER online Tutorial on my blog.
I really hope you enjoy this, as I'm hoping to do more!
Be sure to comment - Let me know what you liked about the Tutorial and If you have any suggestions on improvements or Ideas for future Tutorials.
This is the WOW demonstration I did at the recent Melbourne Stampin' Up! Regionals
Step 1: COLLECT your Materials
For this project I'm using:
Onboard Accents - Heart shape chipboard, Whisper White pigment ink pad, Heat and Stick Powder, Dazzling Diamonds Glitter, Heat gun tool.
Step 2: INK up your chipboard
Using the Whisper White Pigment ink pad, ink up the entire chipboard shape.
Step 3: Sprinkle HEAT and STICK powder ALL over your 'inked' chipboard shape
Using one of our Powder Pal trays, makes using embossing powders and glitters a breeze to clean up. Once you have covered your chipboard shape with the Heat and Stick Powder, tap off excess into the tray and then pour back into its container.
Step 4: HEAT set the Heat and Stick Powder
With your heat gun, heat the Heat and stick powder until it goes 'glossy' - take care as you CAN OVER HEAT and burn. I like to use a rotating motion. You will see the powder go from Matte to Glossy fairly quickly.
Step 5: Adding the DAZZLING DIAMONDS
Sprinkle the Dazzling Diamonds over your Chipboard piece - that is NOW 'sticky' with the heated Heat and Stick Powder - Tap off excess into your Powder Pal Tray.
Step 6: Heat Set your Dazzling Diamonds
Once again use your Heat Gun Tool to 'quickly' re-heat and to Set the Glitter. This only takes a moment - be very careful not to OVER HEAT.
Step 7: Add to a Decorative box
For my triangle shaped box, I have used:
Basic Black cardstock, stamped with the NEW French Flaire background stamp (available from the 1st of December) in Whisper White Ink, I have decorated my Accents Chipboard shape with some of the NEW ribbons from the FLIRTY ribbon pack (also available from the 1st of December)
I have recently posted the new SUMMER MINI - 1st Dec to 31st of March catalogue to all my customers and to those who have requested one. If you have not received your copy, or if you would like to receive one - please email me with your mailing address and I will send one out to you asap.
fleurie78@optusnet.com.au
DON'T FORGET
Our SPRING MINI Catalogue will be ENDING on the 30th of November
If there is anything in the catalogue that you would like - please email me with your order before the end of the month....as it may not make next years Idea Book & Catalogue.
posted by fleurie at 3:03 pm
![]()


6 Comments:
Great tute Fleurie - the pics are excellent! And just LOVE the heart - it looks sugar frosted... can't wait to have a go!
xx J.
Great tutorial Fleur,
Nice and easy to follow. Cant wait to try it.
Leanne
fantastic fleur ..the step by step instructions are very easy to follow ..i cant wait to give it a go...
Looks fabulous Fleur!
Belinda
xx
Looks fantastic Fleur, you have out done yourself again, bravo
Cute ! TFS
Post a Comment
<< Home